
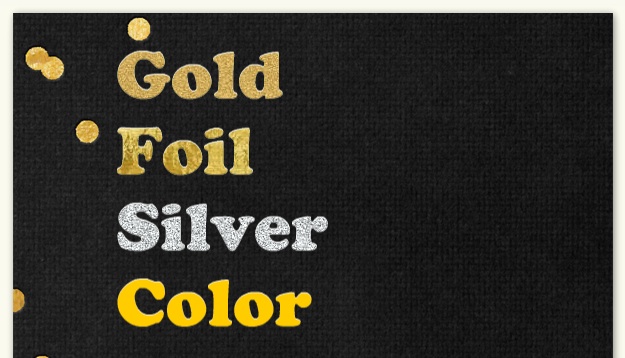
Text customization is a big part of our card creation process here at Paperless Post. We want to enable users to easily create beautiful and unique cards. One feature we thought would be cool would be for the user to be able to foil stamp or gold emboss text, which would give text a texturized silver or gold effect.
When assessing how to implement these text effects, we needed a solution that wouldn’t interfere with any existing customization functionality and would also fit easily into our pipeline without slowing everything down. Essentially, our goal was to color the text with the gold or silver texture images, or mask the images with the text.
Currently we are using a simple Flash text field to render all of the text within a card. Flash supports a wide array of options for graphical customization and bitmap filters. One possibility was to add the image to the stage, put the text over it, and either make the text a mask or change the blend mode of the text field. The issue with a solution like this was that it prevented us from having gold, silver and plain text within a single text field. There didn’t seem to be a way to achieve the effect we wanted using a technique like this without overcomplicating everything with duplicate text layers and strange layering hacks.
What we needed was a way to intelligently replace certain text with the texture, while ignoring other parts of the text field. A graphical effect with logic? Sounds like a job for a shader. Flash supports pixel shaders using their proprietary Pixel Bender software. In order to apply a shader written using Pixel Bender, you need to import the shader byte code, create a shader object with the byte code, create a shader filter from that shader object, and finally pass that filter into the filters property of a Flash display object.
1 2 3 4 5 6 7 8 | |
This code loads the byte code for the pixel shader ‘myShader.pbj’ and then
passes it into the shader constructor, which creates the executable shader object
shader. The shader filter is then created with the executable shader. This
shader can then be passed to the filters array of any display object, which will
cause the pixel shader to operate on the display object.
The way we implemented our gold and silver text effects was by choosing certain colors that we did not use in our card creation app. When the user selects the gold and silver text effects for a segment of text, that segment of text is assigned a certain color that corresponds to a gold or silver effect. The shader we wrote only targets these colors, and if it is able to find the colors, it replaces that pixel with a sampled pixel from the texture image. This is essentially a smart mask or intelligent blend filter.
Our shader takes in colors and texture images, with each color corresponding
respectively to the texture image. So if the pixel shader finds a color1 it will
replace it with a sampled pixel from textureImage1. We sample from the image
using a 3x3 grid, from an input image called foreground.
1 2 3 4 5 6 7 8 9 | |
We sample using a 3x3 grid because we want to replace antialiased pixels that may not have the same color value that we are looking for, but should still be replaced. Because antialiased pixels will be adjacent to the true color of the text, we check whether any color in the 3x3 grid is the target color. We then check to see which sampled pixel is closest to the target color.
1 2 3 | |
If this distance is lower than our target threshold, we set the output pixel to a sampled texture value. Otherwise, we set it to the center of the sampled input matrix.
1 2 3 4 5 6 7 8 | |
You can see here that we use the alpha value of the original sampled center pixel for the output pixel. This is to ensure that if the text was originally blending with something in the background, so will the gold or silver text effect.
After trying a variety of other methods of applying these types of effects, this really seems to be the only way to achieve this quality of effect without drastically slowing down the runtime. You can try it out on a card here. Try changing different parts of the text to different metallic colors. All of these metallics are applied with a single shader that is sent a new texture for each metallic color you choose.
If you want to learn more about Pixel Bender, Adobe keeps a list of shaders here; or you can come work/intern with us! Most of this shader work was done by Nick Schaubeck, one of our very talented interns. We’re looking for more talented people in NYC and SF.